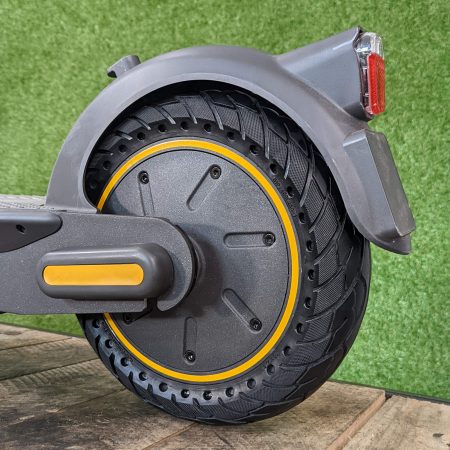
Introduction: solid tire Ninebot Max G30 Rear wheel
Hello everyone! In this tutorial we will see together how to install a solid tire on the rear wheel of a Ninebot Max G30. So there will be 2 main parts. The first where we remove the old Tubeless tire. And the second where we install the solid tire. Obviously we show you in this video the techniques that we think are the most effective, but feel free to do otherwise.
You will need the following equipment:
🛒 The Ninebot G30 solid puncture-proof tire
Removing the rear fork covers
Alright, let’s get started by removing the yellow stickers to access the screws. If you have a hairdryer, feel free to heat them up to make them easier to peel off.

We pass the blade of the cutter under the sticker to lift a section and remove it.

We unscrew the two plastic cover screws with a 2.5mm Allen key.

And we do the same on the other side of our Ninebot G30 Max.

Disconnecting the motor
Now I’m going to turn the scooter upside down. And we’re going to remove the 18 screws from the cover using a T15 Torx key.

Because yes, the engineers at Segway have thought of everything, and we have to disconnect the motor inside the scooter’s guts to be able to change its flat tire.

Once we finish unscrewing, we can lift the cover and set it aside.

Now, if we follow the motor cable, we see that to remove the wheel, we need to unclip:
The 3 wires of the motor (brown, yellow, and blue).
Also, disconnect a fourth cable connected to the controller.

So, let’s go, we unplug the brown cable, the blue cable, and the yellow cable.

As for the fourth cable, we can’t unplug it like that, it would be too easy.
First, we need to unscrew the two screws that hold the controller to the frame with a 3mm Allen key.

So, we unscrew the one on the right and the one on the left.

Now you can lift the controller and disconnect the motor connector with the 5 small red, yellow, green, blue, and black wires.

And all we have to do is pull the motor cable out of the scooter.

For those who are wondering, no, I did not disconnect the battery before disconnecting the motor cables because Segway had the brilliant idea of sticking a warranty sticker on the connector.

Removing the rear wheel
Moving on with a flat wrench or an 18mm socket, we unscrew the two nuts of the rear wheel axle.


Then we can remove the two locking washers.

Now that the motor is separated from the scooter, we can lift the rear wheel and place it aside.

Removing the tire from the rim
I will now remove all the air from the tire.
For that, I press on the tire while pressing in the middle of the valve.
Instead of doing that, you can simply remove the valve cap.

Now we are going to remove the tire from the rim.
To do this without using force, I will use a corner of a table and two good clamps.
To avoid scratching the rear wheel, I will place a cloth on the corner of my table.

Then I place the rear wheel of the G30 Max on the corner of the table.
And I will tighten the edges of the tire with my two clamps until the tire bead comes out of its seating.

And here are two more shots so that you can see the technique clearly.


After detaching one side of the tire, just flip the wheel and do the same on the other side to release the second side of the tire.

I protect the cables by putting them in a small plastic bag.

Removing the flat tire from the wheel
Now that the tire is no longer locked on the rim, we can remove it.
To do this, I will start by squeezing the edges of my tire with my clamps.

And now I push the motor down so that the pinched part of the tire goes into the rim recess.

By doing this, the upper part of the tire rises up, making it much easier to remove.

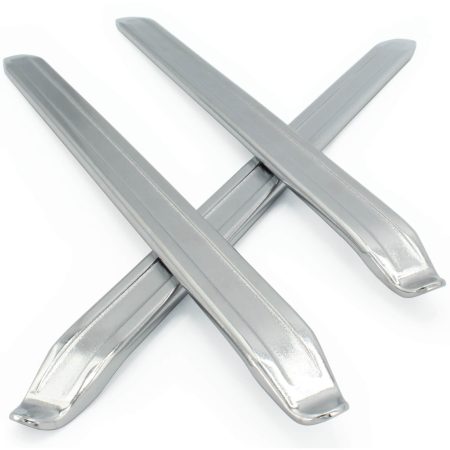
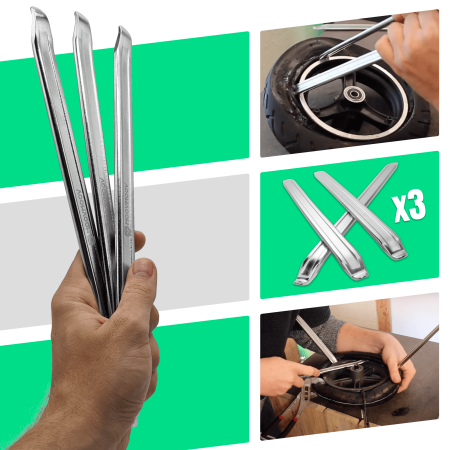
To make it slide, I apply some soapy water around the tire. I also apply it to the edges of my Hercules tire levers.

And now I can remove the upper part using my tire levers.


After removing half of the tire from the rim, we can remove the clamps and continue going around the rear wheel with our tire levers.

Then I lubricate the other side of the tire, and I can remove it by hand.

Preparing for the installation of the 10-inch solid tire
Now, we will move on to the installation of the solid tire on the rear wheel.
To facilitate the installation, we will soften the tire rubber by placing it in boiling water for 15 minutes.

After 15 minutes, I take the solid tire out of the hot water and dry it.

Next, I recommend the following setup:
Sit comfortably to be stable and avoid back strain.
Have the following items next to you: tire levers, liquid soap, some tissue paper, the solid tire, and the rear wheel.
Protect the floor with cardboard to prevent scratches.

Installation of the puncture-proof tire
To avoid mounting the tire in the wrong direction, we check the rotation direction of the tire and rim.
There is a small arrow on the side of the tire indicating the rotation direction.

Then I place the motor above the tire. To ensure smooth sliding, I apply some soapy water to the tire edges, around the rear wheel, and on the flat edges of my tire levers. And I dry my hands well to avoid slipping.

Now, I install one part of the tire into the tire and place both feet on top to secure it.


Then, I use my tire levers to gradually pry the tire and pass it over the rim.
I use my feet and the weight of my body to hold the wheel in place.


Mounting a solid tire is not easy and requires strength.
So, don’t hesitate to ask for assistance from someone who can hold a tire lever while you leverage with the others.


Centering the puncture-proof tire
Now that the tire is mounted on the rear wheel, I will center it on the rim.
For that, I will slide my tire levers under the improperly positioned parts to lift them and install them correctly.


Mounting the solid wheel back on the scooter
Now, we can reattach the solid wheel to the rear of our Ninebot G30 Max.
So, we pass the cables through the chassis.

And we slide the wheel axle onto the rear fork.


Reconnecting the motor
We reconnect the motor cable to the controller.

We reconnect the three blue, brown, and yellow cables.

And we put the rubber sealing cover back in place.

We secure the controller to the scooter with the two screws on the left and right.

We tidy up the electrical wires a bit and close this housing for good.


Completing the installation of the Ninebot G30 Max solid tire
We put back the two locking washers on the left and right of the axle.


We secure the rear wheel with the two nuts.

I turn our Ninebot G30 Max back upright.

And we finish the installation of this puncture-proof tire by putting back the covers and stickers.


Products related to this tutorial

Other tutorials that may interest you

Ninebot G30 MAX: REAR WHEEL – How to change the 60/70-6.5 Tubeless tyre?
How to change the REAR TyRE of a Ninebot G30 MAX electric scooter? In this repair tutorial, we present our method for: Removing the punctured Tubeless tire on the REAR WHEEL and installing a new 60/70-6.5 tyre.

Installing a solid tire for the Ninebot G30 Max – FRONT WHEEL
There are different models of Ninebot KickScooter Powered By Segway: Max G30 – Max G30P – Max G30LP – G30D – MAX G30E II – MAX G30LE II – Etc. All of these G30 scooter references have the same wheels and you can follow this tutorial without any problem. We know that this installation is not an easy operation. In any case, we hope that this video will allow you to succeed.

Ninebot Max G30 – How to change the tubeless tyre on the FRONT wheel – Segway KickScooter
How to change the tyre on a Ninebot G30 MAX electric scooter? In this tutorial, we show you our method for: removing a flat tubeless tyre from the front wheel and installing a new 60/70-6.5 tyre