Introduction: Repairing the rear wheel of a Ninebot G30 Max
Hello everyone, In this video we will show you how we change the rear tire of a Ninebot G30 Max. We tried to make this tutorial as detailed as possible and with all our tips, so that you can know exactly how to proceed. And we are not saying that this is the only method, but we obviously hope that this video will help you as much as possible.
You will need the following materials:
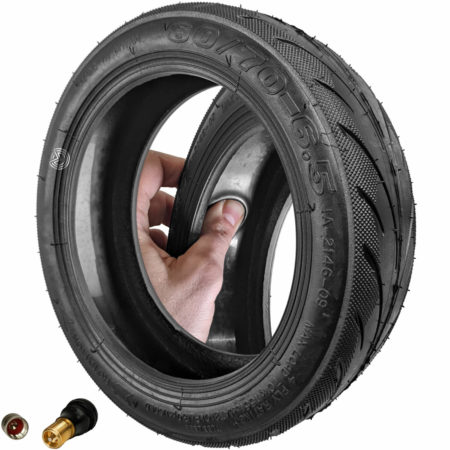
🛒 The tubeless tire 60/70-6.5 Ninebot G30
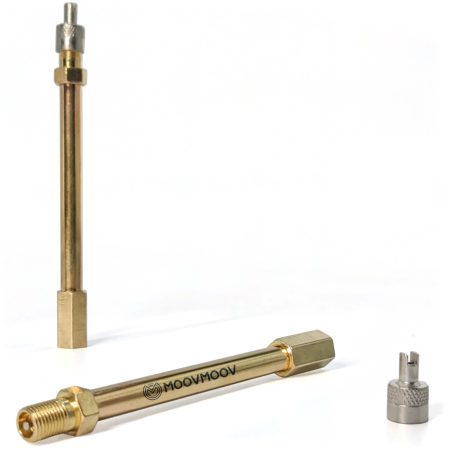
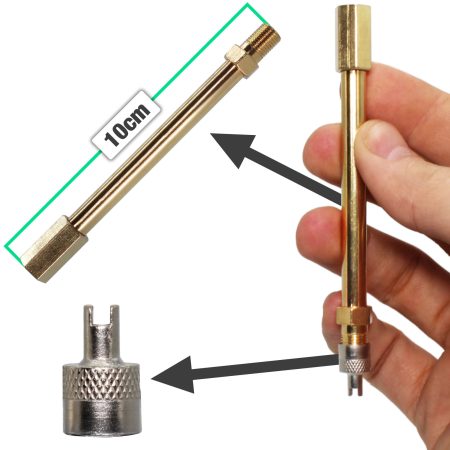
🛒 The perfect valve extension to inflate your tires easily
Remove the rear fork covers
So here we go, we’re going to start by removing the yellow stickers to access the screws.
If you have a hair dryer, feel free to heat them up so they can come off more easily.
 We slide the blade of the cutter under the sticker to lift a portion and remove it.
 We unscrew the two plastic cover screws with a 2.5mm Allen wrench.
 And we do the same on the other side of our Ninebot G30 Max.

Disconnecting the motor
Now I’m going to flip the scooter over. And we’ll remove the 18 screws from the cover using a T15 Torx wrench.
 Because yes, the engineers at Segway have thought of everything, and we have to disconnect the motor inside the scooter to be able to change the flat tire.
 When we’re done unscrewing, we can lift the cover and set it aside.
 Now, if we follow the motor cable, we can see that to remove the wheel, we need to unclip:
The 3 wires of the brown, yellow, and blue motor.
Plus, unplug a fourth cable connected to the controller.
 So let’s go, we unplug the brown cable, the blue cable, and the yellow cable.
 As for the fourth cable, we can’t unplug it like that; it would be too easy. First, we need to unscrew the two screws that hold the controller on the frame with a 3mm Allen wrench.
 So we unscrew the first one on the right and the second one on the left.
 Now you can lift the controller and disconnect the motor connector with the 5 small wires: red, yellow, green, blue, and black.
 And all that’s left is to remove the motor cable from the scooter.
 Now, for those who may wonder, no, I didn’t disconnect the battery before disconnecting the motor cables because Segway had the brilliant idea of putting a warranty sticker on the connector.

Removing the rear wheel
Let’s continue with a flat wrench or an 18mm socket, we unscrew the two nuts of the rear wheel axle.


And then we can remove the two locking washers.
 Now that the motor is separated from the scooter, we can lift the rear wheel and set it aside.

Removing the tire from the rim
I will now remove all the air from the tire. For that, I press on the tire while pressing in the middle of the valve. If your valve is damaged, you can get a new valve. Instead of doing that, you can simply remove the valve core.

Now we’re going to remove the tire from the rim. To do this without using force, I will use a corner of a table and two good clamps. To avoid scratching the rear wheel, I will put a cloth on the corner of my table.

Then I place the rear wheel of the G30 Max on the corner of the table. And I will tighten the edges of the tire with my two clamps until the tire bead comes out of its seat.
 And here are two more shots so you can see the technique well.


After loosening the first side, simply flip the wheel and do the same on the other side to remove the second side of the tire.

I protect the cables by putting them in a small plastic bag.

Remove the punctured tire from the wheel
Now that the tire is no longer locked to the rim, we can remove it. To do this, I’ll start by tightening the edges of the tire with my clamps.
 And now I push the motor downward so that the pinched part of the tire goes into the recess of the rim.
 By doing this, the upper part of the tire rises upward, making it much easier to remove.
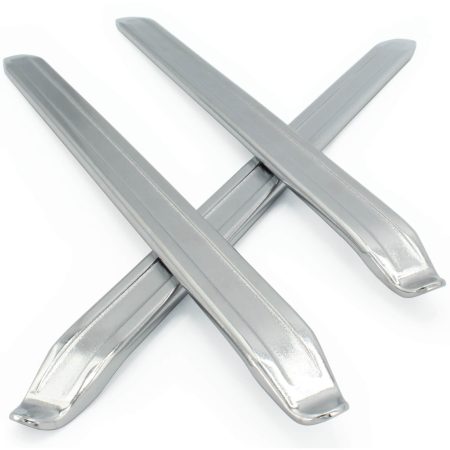
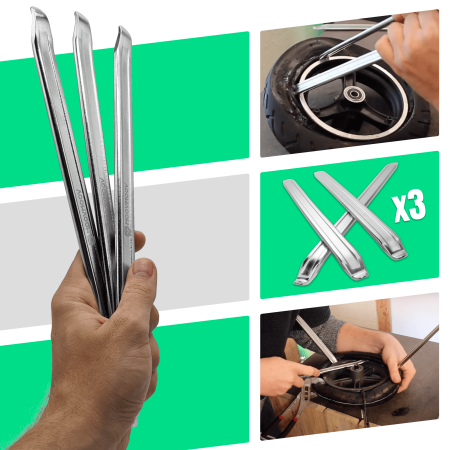
 To make it slide, I apply some soapy water around the tire, and I also apply it to the edges of my Hercules tire levers.
 And now I can remove the upper part using my tire levers.


After removing half of the tire from the rim, we can remove our clamps and continue going around the rear wheel with our tire levers.
 Then, I lubricate the other side of the tire and I can remove it by hand.

Mounting the new tire
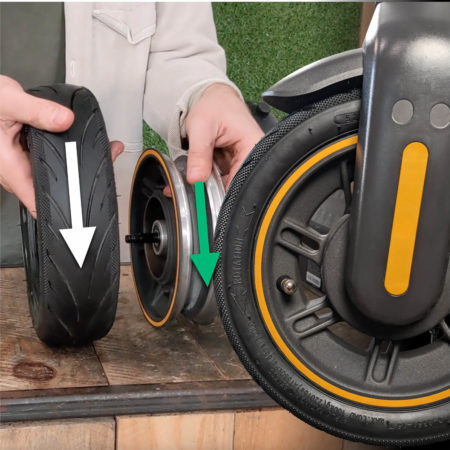
Now let’s see how to mount a rear tire on a Ninebot G30 Max.
First, we check the rotation direction of the motor and the tire. The rotation direction of the tire is indicated on the side of the tire.
 I install the motor above the tire.
I apply some soapy water around the tire and the rim.
And on the edges of the tire levers.
 I insert a first part of the rear wheel into the tire, and I gently push the motor into the tire while going around with a tire lever.
 After installing the first side, we switch back to assembly mode with our clamps.
So we bring the sides of the tire closer together by tightening the edges with our clamps.
 Then we apply some soapy water to the edges and push the tightened part inside the rim.
 Now we use our tire levers to lever the whole assembly over the rim.
 We remove the two clamps and press on the edges of the tire to center it around the wheel before moving on to inflation.

Inflation and tire pressure for Ninebot G30 Max
Since the Ninebot G30 Max has tubeless tires, meaning they have no inner tube, we need to deliver a large amount of air at once so that the tire beads fit into their slots. And usually, we hear a good snap when the edges of the tire stick to the rim.

In terms of pressure, the recommended maximum pressure is 3.8 bars, which is equivalent to 55 PSI.

Here, I had removed the valve cap, so I deflate my tire, put the cap back on, and inflate the tire again.
 There are many tricks to successfully inflate a tubeless tire. We won’t cover all of them here, but here’s one:
If you see that one edge is having difficulty positioning itself, don’t hesitate to apply some soapy water to help the tire edge slide onto the rim.

Reinstall the rear wheel
Now we can reinstall the rear wheel on our G30 Max.
Reconnect the motor
So we thread the cables through the frame. Then we slide the wheel axle onto the rear fork. We put the rubber sealing cover back in place.

We reconnect the cable to the controller.

And we reconnect the blue, brown, and yellow cables.
 Then we tighten the controller to the frame with the two screws.

Close the scooter
We tidy up the electrical wires and close this housing for good.


Finish the repair of the rear tire of Ninebot G30 Max
We put the two locking washers on the left and right of the axle.


We secure the rear wheel with the two nuts.

I put our Ninebot G30 Max back on its feet. And we complete the installation of this new tubeless tire by reattaching the covers and stickers.


Products related to this tutorial
Other tutorials that may interest you

Solid tire Ninebot Max G30: REAR WHEEL – How to install a solid tyre?
How to install a solid tire on the rear wheel of a Ninebot G30 Max? In this repair tutorial, we present our method for removing the punctured Tubeless tire on the rear wheel and installing a 10-inch solid tire on the motor.

Installing a solid tire for the Ninebot G30 Max – FRONT WHEEL
There are different models of Ninebot KickScooter Powered By Segway: Max G30 – Max G30P – Max G30LP – G30D – MAX G30E II – MAX G30LE II – Etc. All of these G30 scooter references have the same wheels and you can follow this tutorial without any problem. We know that this installation is not an easy operation. In any case, we hope that this video will allow you to succeed.

Ninebot Max G30 – How to change the tubeless tyre on the FRONT wheel – Segway KickScooter
How to change the tyre on a Ninebot G30 MAX electric scooter? In this tutorial, we show you our method for: removing a flat tubeless tyre from the front wheel and installing a new 60/70-6.5 tyre